Wednesday, May 31, 2017

More packing

Almost all of the books are packed, so now it's time to pack the fabric. My stash has two parts...hunks of fabric that are one yard or more. When I first started quilting, I bought larger pieces. Now, however, I tend to prefer half yards. So the stacked fabric tends to be older fabric. This is the stack of dark blues.

 Here are the medium blues. Obviously, with use, the values get mixed.

And here are the light blues. I don't yet know how much fabric I can pack in a small box. I also don't know whether I should first pack it into a plastic bag or put it straight into the cardboard box.

As I was taking pictures of the blue fabric, Molly realized that I needed her help.

Then Molly helped me by climbing into the box as I was packing the blue fabric.

I thought I was making progress without her help.

Molly disagreed then decided to take a nap.

While Molly takes a snooze, I can show you some of the quilts I packed yesterday. This is a yellow and green trip around the world variation that was inspired by fall colors...although it screams spring too.

And this was a small quilt I made as part of a class I took with Carol Taylor. She was showing improv curves, skinny strips and spiral machine quilting...all combined in a single quilt.

 And this one doesn't have a name. I made it to feature a rather strange orange and turquoise fabric. The fabric strip surrounded by orange strips is the same fabric as the fabric strip surrounded by the black strips.  If I run across that fabric again as I pack, I'll take a picture of it so you can see how cool it is...and worthy of its own quilt.

And this quilt was also made in the 1990's. I have forgotten the name of this pattern.

And I think this bento box wallhanging was made in the 1980s.

Last but not least, I thought I should show you the Momma Bear's technique for picking unripe peaches. She stood up on her hind legs, pulled the main tree branch down with her front paws, and then picked the peaches with her mouth. One of her cubs is scouting around in the grass/weeds under the tree on the right side of the photo.


Tuesday, May 30, 2017

Visitors

Yesterday, I received a visit from a single mother with three youngsters. She stopped by for some unripe peaches.

It was very hard to get photos of her cubs because they were wrestling and running up the peach tree and quite unwilling to stay still. At first I only saw two cubs. But then the family went on high alert. Two of the cubs left for the woods and then a third came barreling out of the peach tree and followed them.

The mother followed shortly thereafter. I only saw the bears because Molly made a dash downstairs to watch the activities in the front yard. However, she makes the same dash for a squirrel or a moth, so I wasn't expecting much.

Despite all the visitors and packing, I have made more pickle wedges. I have 15 more wedges to make and then I can move on to the rest of the quilt.

Buddy doesn't know which project he prefers.

And here is another vintage butterfly...oops...let me amend that. Here is Molly's hind end heading upward while the vintage butterfly block falls downward.

And here's Molly looking around the design wall to assess her damages.

And here is the vintage butterfly block without kitten kommentary.


Monday, May 29, 2017

Packing quilts

This is a bow-tie quilt that I made back in the 1990's. As I am packing books, I am adding quilts as filler to keep the boxes from getting too heavy. And I have finally finished packing the books downstairs.

I pack each quilt in a plastic bag, and of course, each bag is carefully inspected first.

And this is a bear's paw that my grandmother made and that my father took to college.

Here is the origami crane (or swan) quilt that I made the first year I participated in the Rainbow Scrappy Challenge. And now its all packed away for its trip across the country.

Saturday, May 27, 2017

Green spools

A last little bit of green for the month of May. For more impressive acts of green, please visit the Rainbow Scrappy Challenge.

Of course, I had to hurry back to help Molly with the packing.

 Molly did take some time off to pose for you.

Meanwhile, Buddy the lap pony, is helping hold down the spiderweb blocks so they don't crawl away.


Thursday, May 25, 2017

Bits of Patchwork Progress

I may be making two vintage butterfly quilts or maybe a two-sided version. I find that I am attracted to oddball colorways with bits of black that have an old timey look. And then, of course, I have the brights. It's probably about time to figure out how far along I am on making one side.

Buddy can be very chill.

But Buddy has to remain vigilant in case staff tries to slip his sister Molly a treat without his knowing about it.

Tuesday, May 23, 2017

Molly Movers

As part of packing for the move, I am sorting through the various projects I have underway. I typically store each project in its own plastic bin, but I'm now moving projects I might complete into plastic bags, and the ones I won't finish go into the scrap pile. Here are some mice I began a few years ago as part of the Rainbow Scrappy Challenge. I think I switched to kittens, and then really, who can go back to mice after that?

I also uncovered these blocks. I was thinking that maybe I could make some more and make a baby quilt.

Molly thinks the blocks look better scattered on the floor.

She also monitors the packing to make sure no kittens get trapped in the boxes. Needless to say, my fabric stash provides a limitless supply of packing material.

I wrap quilts in plastic bags before packing them and Molly inspects these as well.

Sunday, May 21, 2017

Sheep tutorial: Left-sided

Today the green sheep would like to demonstrate how to make a left-sided sheep. Happily, most of the components of the sheep are the same whether it is right-sided or left sided. There are only four components that are different. The layout is very different, however.

You can essentially cut all of the pieces the same as for the right-sided tutorial, and also piece together the components such as the wool coat, the ears and the legs. The four components that are different are

1. the tail:  The tail is a 2 by 2.75 dark rectangle with 1.25 inch flip triangles of background fabric in the upper left corner and the lower right corner.

2. upper tip of wool coat (next to the sheep's face):  the 2 by 2.75 background rectangle has a 1.25 inch flip triangle of dark fabric in the lower right corner.

3. top left wool puff: the sheep has six 2.75 inch square wool puffs with two 1.25 inch flip triangles on one side. However, for one of these puffs, you add a 1.25 inch flip triangle of light fabric to form the sheep's cheek. For this version, you will take the top puff on the left side and add the 1.25 inch flip triangle of light fabric to the upper right corner.

4. largest dark triangle for sheep's side: Add a 1.25 inch flip triangle of the light fabric to the large 4.25 by 5 inch rectangle of dark fabric.

You can find the instructions for the Right-sided Sheep here.

After you cut the pieces and make the basic components, you can lay out the sheep into its four sectioins: the top of the head, the middle of the head/top coat, the front chest, and the side/hind end.

 The top of this version of the sheep is made just like the right-sided version, except the 2.75 by 5 inch rectangle of background fabric is now on the right side of the sheep. Or if you have the components laid out as shown, sew them together as shown above.

Hopefully, everything looks like this when you're done.

Now lay out the second layer of components. Sew the eyes on either side of the nose section. And sew the tail and the two wool puffs together.

Now sew the top parts of the wool coat on the left side together, then sew the sides of the sheep's face on either side of the eyes/nose. Then sew the 1.25 by 6.5 inch strip of background fabric to the top of the top section of the wool coat.

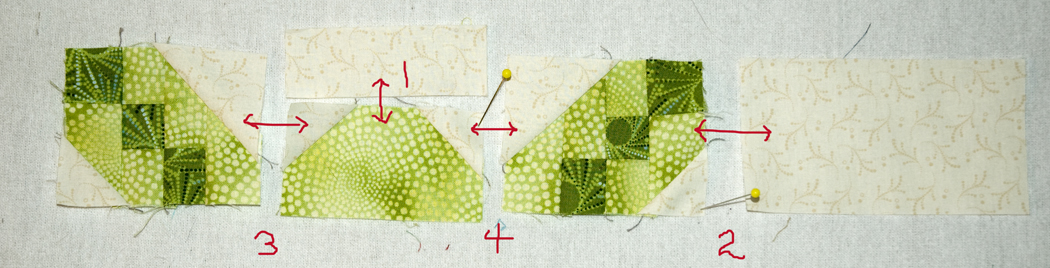
Next, sew the three sections together.

You have now completed the top half of the sheep.

There are a lot of pieces to this section, so let's just start with the lower section. Sew the two rectangles between the front legs together, and then sew the two front legs on either side. Sew togher the 2 inch lower left puff to the 1.25 by 2 inch strip of background fabric. Then sew a puff to the top of this piece and sew a 2.75 inch square of background to the bottom.

Now you can expand the layout to include the nose section and the upper puff. This upper puff has the flip triangle of lift fabric in the upper right corner. Sew this upper puff to the lower section of the wool coat. Sew the nose sections together, then sew the light/dark two-piece components on either side.

Like a cooking show, I've moved ahead and already sewn the nose section to the top chest rectangle. Once you do that, you can sew the front legs to the chest, and sew the wool coat section to the left side of the chest section.

Let's end with the back end. This should get interesting because Buddy is now up on the desk to help if walking on the keyboard can be considered helpful.

For this section, you will want to make sure you added a 1.25 inch square of light fabric to the upper left hand corner of the 4.25 by 5 inch rectangle of dark fabric. Sew the components of the right side of the wool coat together as shown. Then sew the background strips of fabric to either side of the short back leg. Then sew the short back leg section to the 2.75 by 3.5 rectangle of dark fabric. Finally, sew the long back leg to the short back leg section.

Now sew the leg section to the back flank. And then sew on the right side of the woolly coat.

Now you have all four of the major sections of the sheep completed. Sew the sheep's back end to its front end. Then add the eyes section. And finally add the ears section.

Baaah!